Showmapmod
A downloadable tool
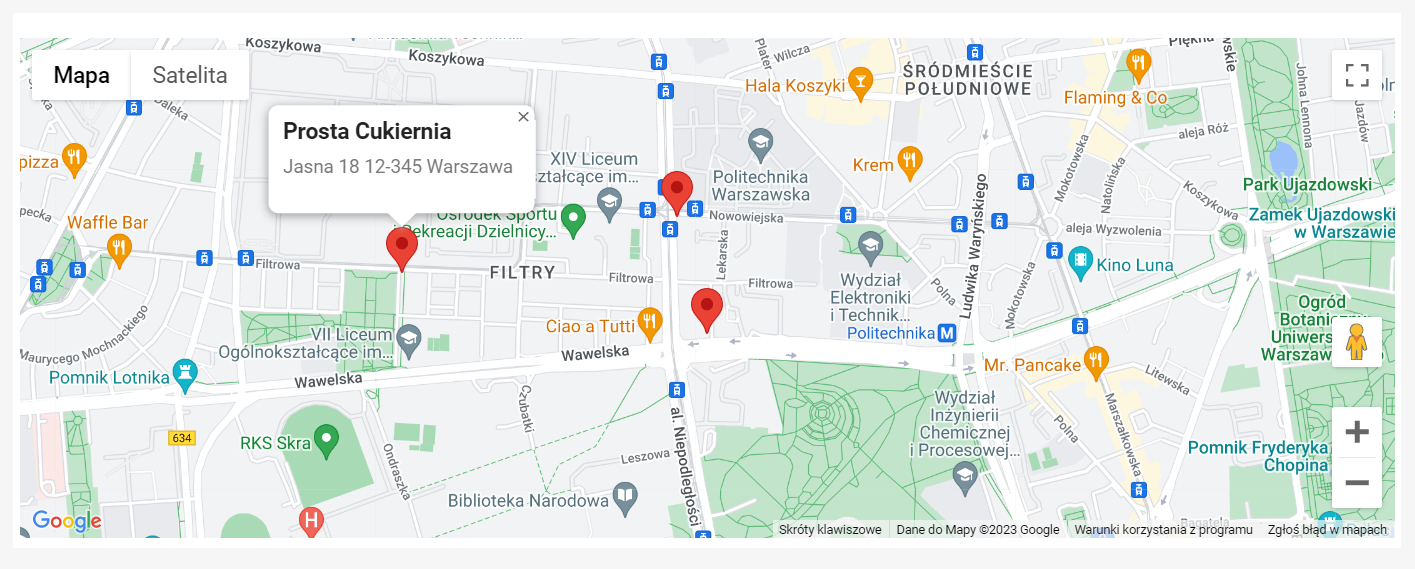
Showmapmod is a module for the PrestaShop software, which, after installation, allows you to insert a Google Map in an online store and place many markers presenting stationary stores on it. The module will optionally allow you to choose the type of Google map displayed on the page.
Admin has the ability to add multiple markers to the map. The markers are saved in the PrestaShop database. A special controller has been prepared in the PrestaShop dashboard for the administrator, which displays a list of all markers in the form of a table. It is possible to edit and delete previously entered markers using intuitive buttons. An additional function is the ability to import csv files containing prepared markers.
After entering the store's website, the customer will see the "Map of stores" link in the upper section. After entering the link, the map configured by the administrator with markers will appear. After clicking the marker, the customer will see the name and description of the tag.
The minimum requirements for the correct operation of the module are:
- having a store based on PrestaShop software in version no older than 1.7.8,
- having an active Maps JavaScript API key.
Download
Install instructions
Here is a step-by-step guide to installing the PrestaShop module:
- Download the PrestaShop module in ZIP format.
- Log in to the administration panel of your PrestaShop store.
- Click the "Modules and services" tab in the menu on the left side of the screen.
- At the top of the page you will find the "Add New Module" button. Click it.
- Click the "Choose File" button and select the module ZIP file you downloaded.
- Click the "Upload this module" button.
- Once the module upload process is complete, PrestaShop will show you a confirmation dialog if you want to install the module. Click the "Install" button to continue.
- PrestaShop will start installing the module. This may take a while.
- After completing the module installation process, PrestaShop will display a message that the module has been successfully installed.
- The module should now be visible in the list of installed modules in the "Modules and services" tab.
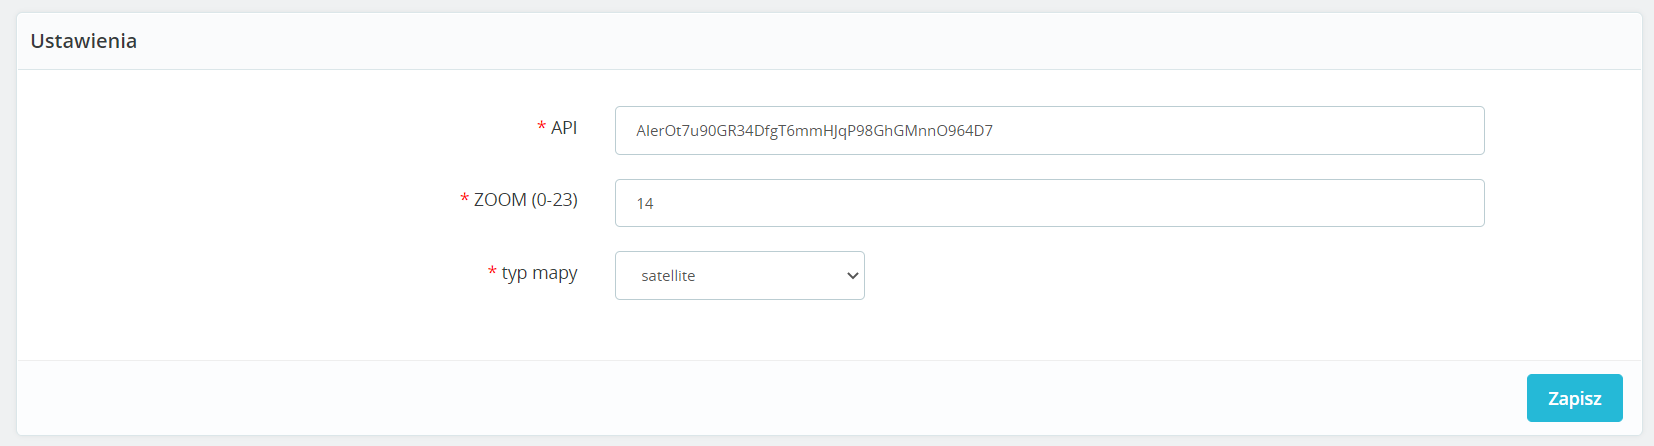
- The module requires configuration. Go to the "Modules and services" section in the administration panel and click the "Configure" button next to the installed module.
- Make any required module configurations and then click the "Save" button.
- After configuring, go to the "Showmapmod" tab visible in the side menu, then add a new marker.
Congratulations! The PrestaShop module has been installed and configured.

Leave a comment
Log in with itch.io to leave a comment.